13 Tips to create a clear instruction manual like IKEA
12/7/2023 Usability
You have spent months, or even years, on the development of your super user-friendly product. Yet, there's a hitch—the user manual isn't quite up to par with your exceptional creation. Your aim is clear: you want an instruction manual that not only matches IKEA's clarity but potentially exceeds it. IKEA has mastered the art of creating manuals that are crystal-clear and user-friendly. The question is, how do their designers do it? In this post, I'll unveil the secrets behind IKEA's manual design, providing insights into their strategies for crafting instructions that truly stand out.
Step #1: Do not illustrate your manual
There is one major thing that should be mentioned that really distinguishes IKEA manuals from other instructions and claims the top position in this post. That is that they are incredibly continuous.
You can't achieve this by illustrating the drawings based on photos or free drawing techniques.
IKEA creates their illustrations for their manual mostly with the original 3D technical drawings.
In order to create similar drawings, make sure you have 3D models of your product available. If you don’t have them, maybe because you simply imported the product, you can easily have them created using freelancers on platforms like Upwork.
To assist in creating a 3D model, make sure you send your freelancer clear photos of all the details and moving parts. These images are crucial for explaining the usage of your product in the user manual.
When your 3D model is ready, use 3D software (more about this at 5). This should be specifically designed to create comprehensive illustrations for technical communication.
IKEA illustrations always use the same perspective and view.
With the right 3D software you can set the desired perspective and view and use it for every illustration, over and over again.
Designers take pains to render each successive picture from a single, unchanging point-of-view (mimicking that of the customer), so that confusing rotations or perspective changes are minimised. The customer can stay oriented more easily as he or she moves back and forth between the booklet and the parts [source].
Achieving a high level of precision is the key to crafting user manuals that are rational and comprehensible.
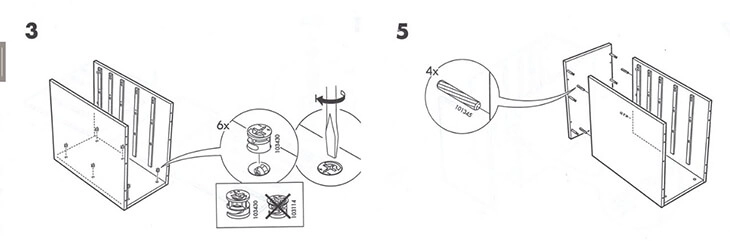
Fig. 1 - Notice how IKEA always uses the same perspective and view
Step #2: Make use of distinctive colours
Although IKEA manuals are famous for their black and white appearance, IKEA is smart enough to make use of colour-coding in their products.
This starts with a smart product design.
When colours play an important role for being able to install the product correctly, IKEA makes sure a coloured image is not necessary by coding the colour in their products.
Let’s have a look at IKEA’s products that require electrical installation. It’s pretty important that you know exactly how to connect electrical wires, don’t you agree?
Where the wires of many products are, for example, a uniform brown, blue or black, IKEA adds an extra coding, like a black line or a spiral-shaped design.
In this way, the coloured wires remain easily distinguishable, even in a black-and-white user manual.
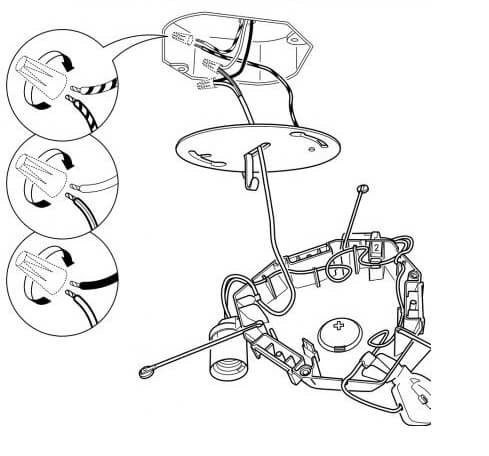
Fig. 2 - Notice how IKEA uses colour coding in their wires
Step #3: Add text to the user manual
An image requires no translation because an image says more than a thousand words. Those are the main reasons why you hardly find any text in IKEA manuals.
I can hear you asking, “Do they use text at all?” Yes, they do!
For most IKEA products, only the installation requires explaining (and not how to use the product). That’s because they are mostly modular low-risk products designed for mass production (more about this at 11 and 12). Text is most often not strictly necessary. For some products, however, it is a must.
Text increases the safety level when there are installation steps that contain a higher level of risk, for example during electrical installation.
Also, it is possible to add any other warnings against residual risks during the complete product lifecycle.
Where installation steps require comprehensive illustrations, explaining the use of a more complex product may still need some textual support.
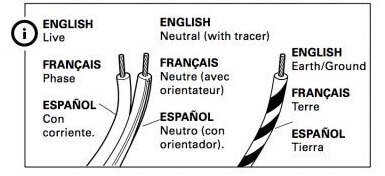
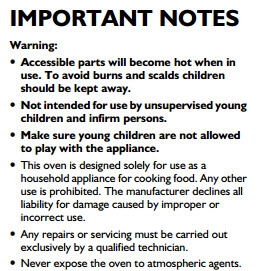

Fig. 3 - Situations where even IKEA uses text
Tips and Techniques delivered to your inbox?
Leave your email address and stay up-to-date with my tips and techniques and improve the quality of your content.
Step #4: Avoid a comic-book kind of approach
Although IKEA manuals very much look like a comic book, we strongly advise avoiding telling a story with a user manual.
Think in topics when creating your user manual!
Topic based communication in technical manuals uses a modular approach for content creation. This approach structures all content around topics.
A topic always has a well-defined beginning and ending. At the end of a topic, a particular task has been completed. This has huge advantages.
By structuring around topics, (parts of) it is possible to mix and reuse topics in different contexts.
The opposite of topic-based authoring is narrative content, written in the same type of linear structure as written books.
One example of a topic-based approach would be the way the following task is described:
Use a screw driver to attach all 14 screws (article number 118331).
Especially when using the same views all the time, this means that it is possible to reuse (parts of) illustrations throughout the manual, or even throughout manuals about other products.
IKEA mainly thinks in topics and reuses content for their ballooning and for the several variants of certain products, like the Billy closet.
To think in terms of topics in your illustrations, a high level of product standardisation is necessary.
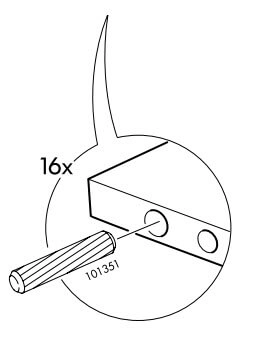

Fig. 4 - Reuse of illustrations
Step #5: Use the right tools
With the right 3D software you can create comprehensive illustrations. With these tools, you can set your perspective and views to create consistent illustrations and ensure consistency for all future publications.
I think Solidworks Composer is by far the best tool to use to achieve the desired level of branding in your company's instructions. But also Inventor, Google Sketchup Pro and Blender might do the job for you just as well. Most of these tools allow you to set line thickness, shadows, colours, etcetera.
Whatever software you use, make sure to export your drawings as vector images.
Additionally, it is very useful to have Adobe Illustrator to edit your illustrations. In Illustrator, you can also add numbers, callouts and other stuff, if you did not do this already in your 3D tool.
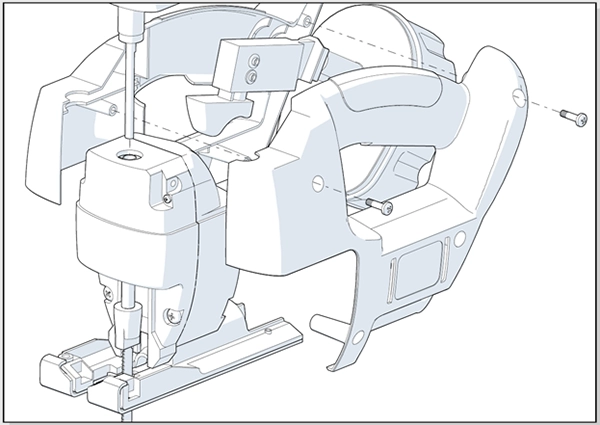
Fig. 5 - An illustration made with Solidworks Composer
Step #6: The IKEA style works best for flat packed installation products
An average user manual contains safety warnings, installation instructions, instructions for use and often some troubleshooting and maintenance information. But this is not the case with most IKEA manuals.
This is because IKEA’s products are mostly flat packed products. The idea of selling flat pack and self-assembly furniture came to IKEA by accident in 1953. When Gillis Lundgren took off the legs of a table so that it could fit into his car after a photo-shoot for the new IKEA mail-order magazine, IKEA’s founder Invar Kampard got thinking and came up with a great idea – flatpacks!
Transportation and assembly were the most costly aspects of his business. Unassembled furniture could lead to significant cost-savings. By 1956, flatpack and self-assembly became the hallmarks of IKEA’s furniture designs. This revolution in furniture land eventually led to the need for IKEA’s distinctive user manuals.
And because most IKEA’s products are not that complex, they don’t need any safety information or a chapter explaining how to use the product. As a result, the installation instructions take up most of the user manual, if not all of it!
So, if your ultimate goal is to provide your product with an IKEA-ish manual, rather than anything else, what you need ideally is a flat pack product that needs to be installed.
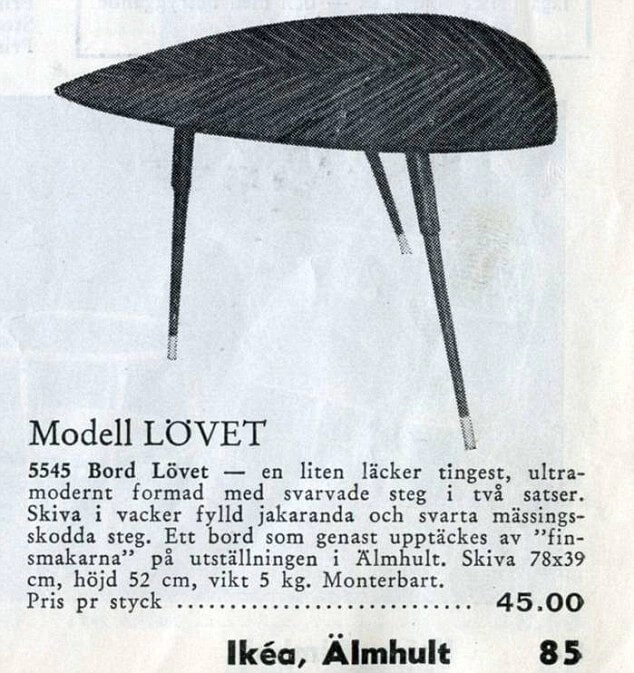
Fig. 6 - The Lovet table from the original IKEA catalogue in the 40s that triggered the flat pack trend
Step #7: Begin with a promise
IKEA manuals start off with a promise: the end result. When buying a product at IKEA, you often dedicate your evening or Saturday afternoon to build your recent purchase. By directly visualising the end result at the start, the user is confident that he will complete his task successfully.
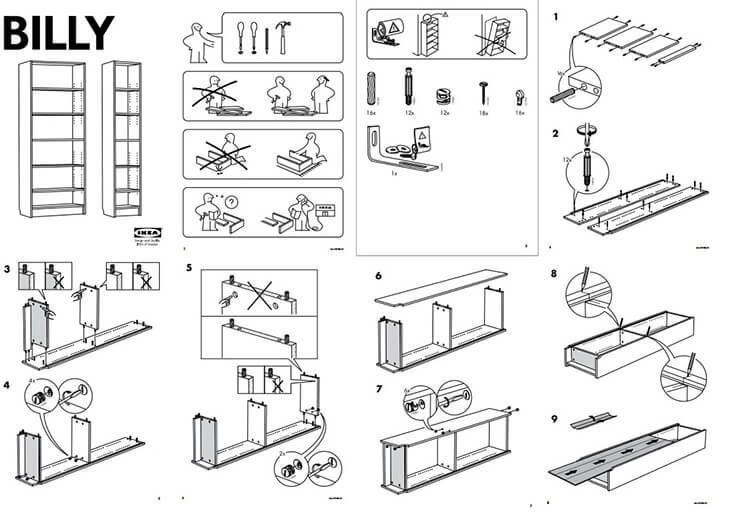
Fig. 7 - IKEA’s big promise at the start of the manual: the end-result
Step #8: Give users more confidence
Some MacGyvers might not even need the instructions at all in order to do the job, but there are also other users that are a bit less confident.
So what does IKEA do? They give all the non-techies the idea that there is always a smart, friendly MacGyver around, who they can ask for help by giving him a call.
And although IKEA does NOT provide a phone number, this little trick seems to work really well psychologically...!
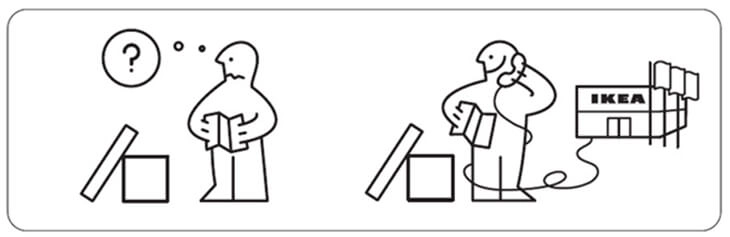
Fig. 8 - Need for help? IKEA is there to support you
Step #9: Modularity works well
Again, a good manual starts with a smart product design.
Many IKEA products are built according to a modular approach. Take IKEA’s IVAR cabinet for instance. This piece of furniture is broken down into modules, allowing customers to reassemble it by simply following an 11-step instruction.
I am not saying that you should only design modular products, but because of modularity many IKEA instructions can stay concise.
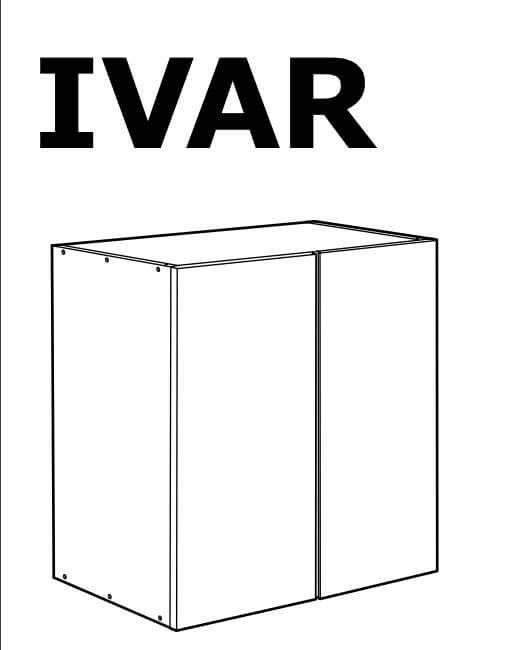
Fig. 9 - Modularity @IKEA
Step #10: Design a product for mass production
When assembling a piece of IKEA furniture, there is just one single design outcome. That is one that the company has designed to be cheap enough for mass production. Mass production means a simple and fully engineered design. Simple designs mean simple instructions.
The more your product is engineered for mass production, the more comprehensive your user manual can become.

Fig. 10 - IKEA factory
Step #11: Use corporate guidelines
Consistent illustrations determine for a large part the look and feel of your manual. However, in order to create ultimate consistent manuals, you should use corporate guidelines for your instructions.
These guidelines include elements for the brand design, logo and a specific font and colours. When using text, also consider to use guidelines for the language (American English or British English?), the tone of voice, the system of measurement, how do different types of information look like (e.g. warnings, instructions, tips) or when to use various types of highlighting (e.g., bold or italics type).

Fig. 11 - IKEA instructions are so iconic that they have been copied for several purposes
Step #12: Know your target audience
Knowing your audience should be rule number one when designing instructions. Different users understand different jargon and not every user has the same knowledge level.
When you sell your product worldwide, the least you should do is translate your instructions into the language of your target country, so your audience can read them.
Besides this, you should be aware of the basic knowledge of your user. This is something IKEA is aware of really well. They manage cultural differences.
IKEA sells their products on every continent. With their affordable furniture, they target the majority of the people living wherever their products are available. Taking into account the basic knowledge of ‘world citizens’, it is IKEA’s mission to create instructions that are understandable by everyone.
So, when designing your instructions, don’t think everyone is just as smart as you! Create easy-to-understand instructions without giving the user the idea that he or she is stupid. Choose a step-by-step approach rather than putting too much information into one illustration.
Step #13: Put the product together yourself
So, do you think you can design the best instructions ever now? Think again!
When your first version is ready, test your own instructions by installing the product with the help of them. Do this yourself, but also set up user feedback. Analyse the results, optimise the instructions and repeat this process over and over again.
There is just one end result possible. Make sure that the user can have no doubt about the way towards it.
Conclusion when creating an IKEA manual
Your user deserves a great user experience at every stage of their customer journey.
After spending all that time on a great product, you also want to give your customer a good experience when consulting the user instructions.
Imagine a user being able to install or use your product without any help from customer support.
Imagine a user manual that contributes to a better user experience.
Imagine a user manual that is just as awesome, or even better, than IKEA’s instructions.
You can achieve this!
In order to do so, follow the steps as described in this post and your users will as excited when installing or using your product with your stunning user manual as you want them to be!
 |
Ferry Vermeulen is a technical communication expert and director at INSTRKTIV. It's Ferry’s mission to create digital user instructions for all products in the world. Listen to the INSTRKTIV podcast on Spotify or read one of his latest blog articles. Linkedin I Spotify I YouTube I Facebook I Twitter |
Tips and Techniques delivered to your inbox?
Leave your email address and stay up-to-date with my tips and techniques and improve the quality of your content.